
Collections and Methods: Bus Query Method
Bus Query Options
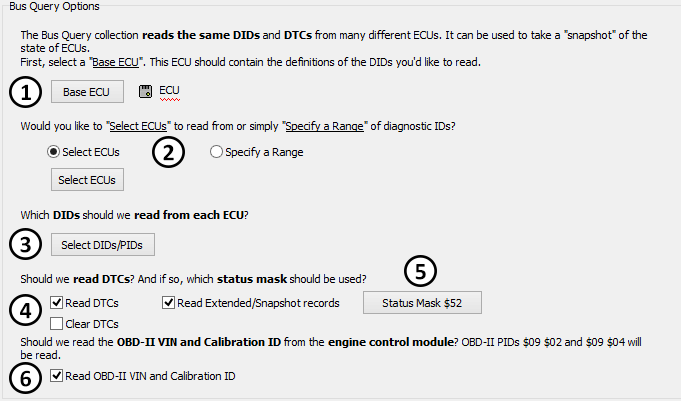
Base ECU
Begin by selecting the base ECU, which contains the definitions of the DIDs you want to read (Figure 1:![]() ).
).
Select ECUs / DID Range
You can choose to read from selected ECUs or specify a range of DIDs (Figure 1:![]() ):
):

Select DIDs/PIDs
Press the Select DIDs/PIDS button to choose the DIDs/PIDs you want to read from each ECU (Figure 1:![]() ).
).
Read DTCs / Status Mask
There are three options to control the reading of DTCs (Figure 1:![]() ):
):
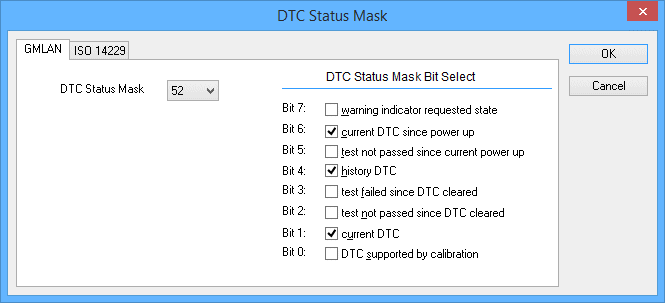
The Status Mask button (Figure 1:![]() ) shows the current DTC status bit mask in hexadecimal form. To change the mask, click the button and a dialog will appear allowing you to select the mask bits (Figure 3).
) shows the current DTC status bit mask in hexadecimal form. To change the mask, click the button and a dialog will appear allowing you to select the mask bits (Figure 3).
Read OBD-II VIN and Calibration ID
Select this option (Figure 1:![]() ) to use J1979 mode $09 to log the VIN (PID $02) and engine control module calibration ID (PID $04).
) to use J1979 mode $09 to log the VIN (PID $02) and engine control module calibration ID (PID $04).